How to Change a Flat Tire on an Offroad Trail
If you make enough trail runs in your custom truck or SUV, you’ll eventually need to make an off-road tire change. It’s not convenient and often frustrating, but changing a truck tire is a necessary skill to master if you want to avoid the long hike of shame back to the highway to call a wrecker. Off-roading on rough terrain always comes with the risk of a flat tire. Between stumps, big drops, and shard rocks, it can happen no matter how careful you are. That’s why it’s important to make sure you understand how to fix a flat tire, load out with the equipment you need to manage it on the trail, and know how to make sure the whole process is safer for you, your vehicle, and your fellow off-roaders.
When Your Outing Falls Flat
Before tackling an off-road tire change, you need to identify the cause because that may give you different options to fix the issue and get back to wheeling faster. While any flat tire is frustrating, not all are created equal.
- Tread Puncture - This happens when something sharp makes it through the tread of your tire. Frequently caused by road or trail debris, the extent of the damage largely determines whether they can be successfully plugged or patched on the trail.
- Sidewall Puncture - Punctures along the sidewall can be more problematic due to the flexion of the sidewall and the heat that can build up at higher speeds.
- Loss of bead - This occurs when the tire separates from the rim. Off-road vehicles are at a heightened risk due to airing down the tires to improve traction.
- Valve Stem Damage - The valve stem can easily be damaged by sharp rocks and stumps on challenging terrain. While you may not need an off-road tire change, you will need to be familiar with flat tire fixes to get back in action.
Tire Changing Basics
 Most of us have or are comfortable with changing a tire on pavement. Off-roading isn’t much different, except for the lack of developed terrain or the roadside assistance backup a phone call away. Before you get started, however, you’ll need a few tools on board before you hit the trail.
- Off-Road Jack - Your vehicle likely came with a small scissor or bottle jack that’s suitable for changing stock tires in your driveway or on the side of the road. Once you get out into the field or customize your truck or SUV with bigger wheels and tires, you need a jack that can do more.
- Hi-Lift Jack - Hi-Lift beam jacks are a staple in the off-road community. They provide a high lift, stow easily, and can be used as a manual winch in a pinch to help recovery efforts.
- Bottle Jack - While your vehicle may have come with a smaller version of this hydraulic powerhouse, an off-road version is bigger to give you more power and higher lifts.
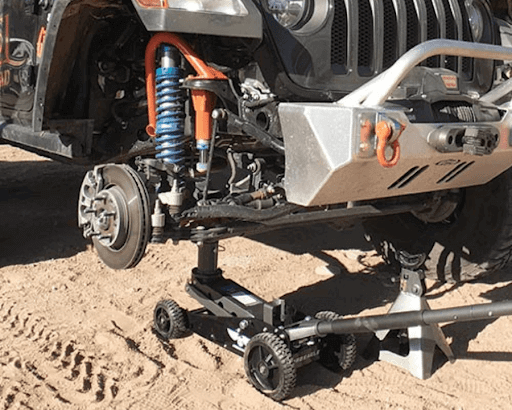
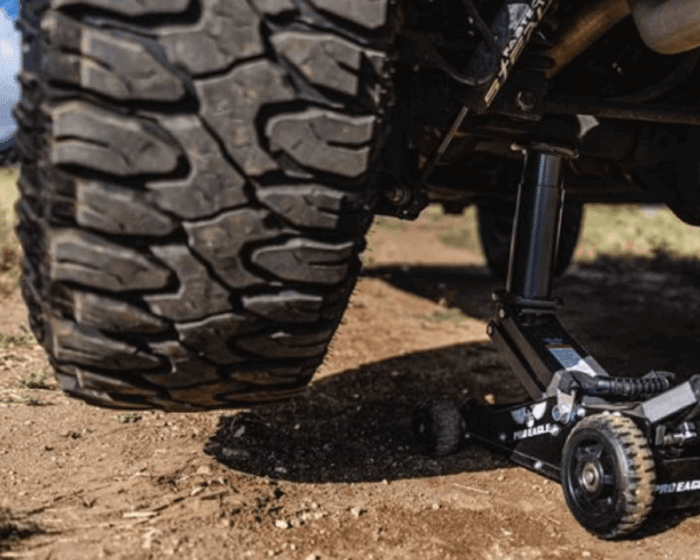
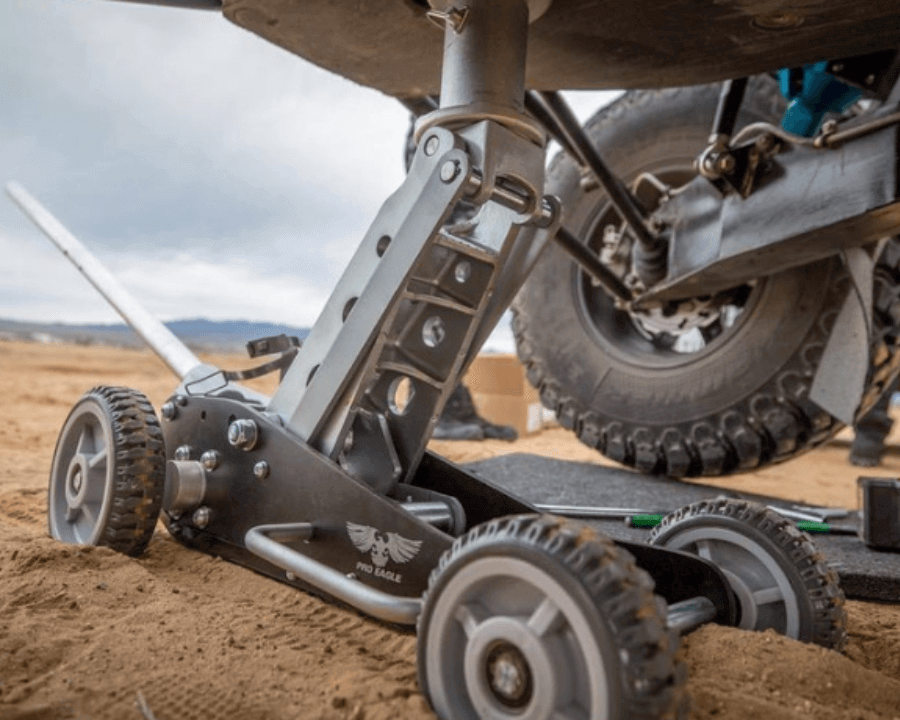
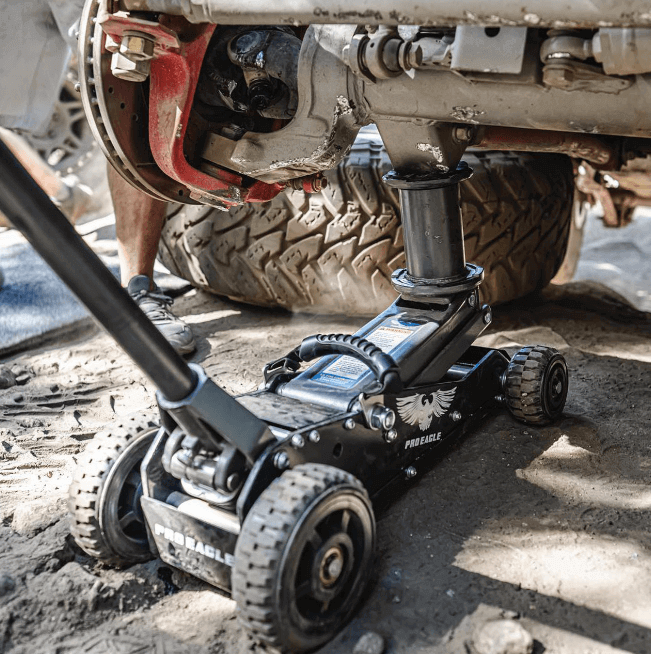
- Pro-Eagle - Pro-Eagle jacks may look like your floor jack in the garage, but they’re made for the uneven, loose terrain encountered while wheeling. Featuring big wheels and a big lift, they’re a safer alternative to bumper jacks.
- Air Compressor and/or Tank - Even if you’re just doing an off-road tire change to put your spare on and keep going, you likely already have a powerful off-road compressor, like the ARB Twin 12V Air Compressor,for airing up and airing down your tires or running air tools. If you do a flat tire fix, however, airing your tire back up may require a large volume of air delivered quickly to reseat the bead, making a large tank such as this option from Klein more suitable for your needs.
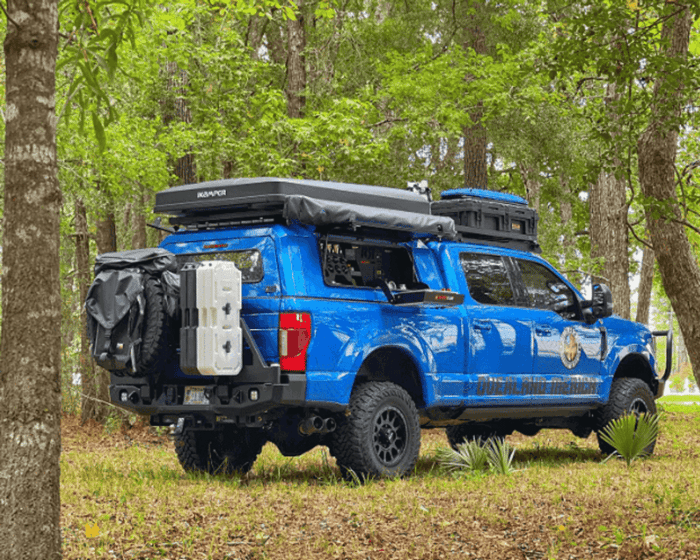
- Spare Tire - Sometimes, you can’t fix the damage, so you need to change your truck tire. You need a spare that’s running a custom wheel and tire that matches the ones on the ground. This will give you better performance as you finish your trek.
- Spare Tire Storage - Stock spare tire mounting points are meant for stock wheels and tires. If you want to run bigger rubber or want to carry more than one, you’ll need a place to secure them in or on your vehicle. A universal spare tire mount can give you a great option for additional storage, or enter your vehicle make and model information at the top of our page to find one custom designed for your truck or SUV.
- Tools - You’ll need a good tire iron or lug wrench at a minimum, but you can do way better. Adding a battery-powered impact wrench can make an off-road tire change fast and easy. Make sure you have the correct key or socket for locking lugs. A good emergency tire repair kit with specialized tools, plugs, and instructions can also come in handy.
 With the right tools, you’re ready to get started. Remember that your brain is the most important tool of all, and it’s the most crucial piece of off-road gear you have. So be sure to make safety a priority. Remember through the entire process of your off-road tire change that you are lifting thousands of pounds of metal monstrosity that gravity is trying desperately to claw back down to Earth, whether the path is clear or if your hand, foot, or head is in the way. It takes one mistake to leave you injured or damage your vehicle.
- Get your vehicle on ground that is as stable and flat as possible. This gives you the best possible platform for lifting your vehicle. If the ground is too soft, use a base plate to distribute the load.
- Use your parking brake AND chock the wheels. If you didn’t bring wheel chocks, there are plenty of rocks that are large enough to wedge your other wheels. This will help prevent your vehicle from shifting while the jack is being used, potentially leading to a dangerous drop.
- Position your jack per the manufacturer’s guidelines. With the extended droop and larger wheels and tires of off-road vehicles, this is often the axle which allows you to lift the wheel off the ground. Beam jacks, like the Hi-Lift, usually lift at the bumper or rock sliders, although there are accessory kits that allow you to hook to the wheel itself. If you do this, you’ll need a block to rest the axle on to remove the tire.
- When you change a tire off-road, just like on pavement, raise it until it clears the ground. This puts it in the best position for identification of the flat’s cause, some flat tire fixes, and removal.
- Examine your wheel and tire. Is it off the rim? Is the valve stem intact? Does it have an obvious puncture in the sidewall? That will determine your next steps. Some flats you can fix with tire plugs, or a quick burst of a large volume of air can reseat a bead. In a pinch, some flats can even be nursed home with a store-bought can of fix-a-flat. If those don’t work, you don’t have the right equipment and materials handy, or if the damage is too extensive for repair, then you’ll need to put on a spare.
- Remove the lugnuts on your flat tire, starting with the topmost, then the nut that is lowest and diagonal from it, then repeating the process, moving diagonally to the furthest non-loosened nut. This relieves the pressure holding your wheel on the hub evenly.
- Position the spare tire on the lug bolts, tightening the nuts in the same pattern they were removed in one by one.
- Check the pressure on your spare, lowering it to match the rest of your aired-down tires. This will give you a smooth, even ride.
- Lower the vehicle gently on the jack until it makes contact with the ground, then ease its weight distribution back onto the suspension. You can now remove and store the jack safely, along with your flat tire and wheel.
- Remember to keep your speed low if you use a flat tire fix rather than changing your tire. When you stop to air up before you head home, take the opportunity to retighten your lug nuts.
Get Ready To Change Your Truck Tires
When you need to be ready for everything the trail will throw at you, we’ve got the custom parts and accessories your truck and SUV need. Call and talk to one of our staff anytime you need more product information or guidance. They’re by the phone days, nights, and weekends. Order the equipment you need to fix a flat tire from Offroad Alliance today.